
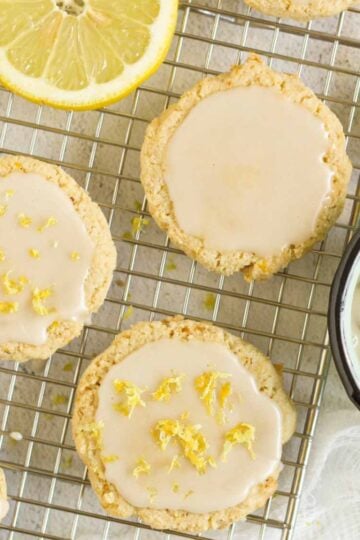
Soft, chewy, and flavor packed gluten-free apple blondies with maple glaze. These cookie bars have the perfect texture and are bursting with fall flavors, like baked apples, cinnamon, and nutmeg. Easy to make and are the perfect fall treat.

If you're looking for an easy fall baked good, look no further. These gluten-free apple blondies are just what you need. Made with simple ingredients and topped with a delicious maple glaze. Perfect for fall, or any time you're craving a cozy, sweet treat.
I love baking in the fall. There is just something about homemade, autumn inspired baked goods... maybe it's how they leave your kitchen smelling amazing, or the coziness they provide right out of the oven, but either way, fall baking is my jam.
But fall baking doesn't stop here! I also love my pumpkin breakfast cookies, healthy apple crisp, gluten-free pumpkin scones, healthy apple bread, almond flour pumpkin muffins, and healthy chocolate chip pumpkin bread.
Jump to:
Why You'll Love These Apple Blondies
- Chewy texture: The soft, dense texture of a blondie goes perfectly with the tart apples.
- Better-for-you: Made with gluten-free flour and minimally sweetened with coconut sugar.
- Easy: These take just 10 minutes to prep before ready for the oven.
- Apple pie flavor: They capture the cozy, cinnamon-spiced sweetness of apple pie in every bite.
What Are Blondies?
Blondies are a type of dessert bar, similar to brownies, but without the chocolate/cocoa powder. They are typically made with ingredients like brown sugar (I use coconut sugar for a better-for-you alternative), butter, flour, eggs, and vanilla extract, which give them a more caramel-like flavor.
The texture of a blondie is similar to a brownie. They are dense, tender and chewy with a melt-in-your mouth texture. I personally prefer a blondie over a brownie. But if you want a brownie recipe, check out my oat flour brownies.
Ingredients for Apple Blondies

A complete list of ingredients and amounts can be found in the recipe card below. Here are some specific call-outs, and when needed, some tips on keeping the ingredients clean.
- Green apple - I like the combination of a tart Granny Smith apple, but any crisp apple can be used.
- Gluten-free flour - I use an organic gluten free blend - Namaste and Arrowhead Mills have always worked well for me. If not gluten free, you can use any regular flour. Organic is always recommended.
- Coconut sugar - I like using natural sweeteners, like coconut sugar. If you don't have any, brown sugar can be used as a substitute.
- Butter - Be sure to use unsalted butter and I like using pasture-raised/grass-fed butter (such as Kerrygold). Not only is it healthier, but I truly believe it adds more flavor, too.
- Pure maple syrup - Please be sure to use pure maple syrup. Not only does it taste a million times better, but it's a real food without corn syrup, caramel color, and lots of other fake stuff.
Step-by-Step Instructions

Step 1: Start by melting the butter in a microwave safe bowl. Next, using a hand-held mixer, mix together melted butter and coconut sugar. Mix until a thick caramel like texture has formed.

Step 2: Add egg, egg yolk, and vanilla to butter/sugar mix and mix on low-speed until just combined.

Step 3: Mix the dry ingredients (except apples) together in a separate bowl.

Step 4: Add dry ingredients to wet ingredients and mix on med-low speed until just combined (do not overmix).

Step 5: Fold in the chopped apples.

Step 6: Evenly spread blondie batter in an 8x8 baking dish that has been lined with parchment paper. Bake at 350-degrees F for 25-28 minutes.

Step 7: Whisk together the powdered sugar, vanilla extract, and pure maple syrup until a thick glaze is formed.

Step 8: Drizzle glaze over the baked blondies. Allow glaze to set before removing from the pan.
⭐Pro Tips⭐
Line the baking pan with parchment paper. Spray a tiny bit of non-stick spray on the bottom of the pan, and then line with parchment paper and allow a little extra paper to hang off the ends. This allows you to easily remove the bars from the pan after they are baked.
Add nuts. If you'd like some extra crunch and flavor, fold in ½ cup of walnuts or pecans in the blondie batter along with the apples.
Don't overmix & don't overbake. Mix until the flour has just been incorporated. This helps create a chewy, dense texture... just the way blondies and cookie bars should be. And don't let these bake beyond just done - this also ensures a chewy, gooey center!
Use coconut powdered sugar. If you'd like a fully refined sugar-free dessert, you can use coconut powdered sugar in the glaze.
Make sure the glaze is thick! If the glaze is too thin, the bars will absorb it over time and you won't be able to taste it as much, plus they won't be as pretty. The glaze should be thin enough to pour, but thick enough that it doesn't spread too much when poured.

Recipe FAQs
For these gluten-free apple blondies, I definitely recommend Granny Smith. The tartness of Granny Smith perfectly balance the sweetness of the bars. If you don't have Granny Smith, another crips variety, such as Honey Crisp or
Yes, you can use a 9x9, just know the bars will be slightly thinner and you'll also need to reduce baking time by 3-5 minutes. You can also double the recipe and make in a 9x13 pan.
No, but it's highly recommended 🙂 However, the glaze does call for powdered sugar, but if you'd like to keep fully refined sugar free, you can use coconut powdered sugar.
I have not tried these with a butter substitute, but I don't see any reason why a plant-based butter wouldn't work. If you do try, please let me know how they turn out.

How to Store These Blondies
Storing: You can store these gluten-free apple blondies for up to 3 days at room temperature, or up to 5 days if stored in the fridge. Just know, as they sit, the glaze may absorb into the bars. These are always BEST the day they are made.
Freezing: You can also freeze these blondies for up to 3 months. If you know you'll be freezing them, I recommend freezing without the glaze and adding the glaze after thawing the bars. You can thaw at room temperature for a couple of hours.
More Apple Recipes to Try!

If you make this recipe, please let me know what you think! I would so appreciate you leaving a star rating and/or comment below. And don't forget to share a photo on Instagram or Facebook and mention @CleanPlateMama!
Eat Clean.Be Well!
-Sara

Gluten-free Apple Blondies
Save This Recipe For Later!
Equipment
- 2 mixing bowls
- 1 hand-held mixer
- 1 8x8 baking dish
Ingredients
Ingredients for the Blondies
- ½ cup unsalted butter
- ¾ cup coconut sugar
- 1 egg, plus 1 egg yolk, room temperature
- 1 tsp. pure vanilla extract
- 1 ⅓ cup gluten-free flour
- ½ tsp. baking powder
- ¼ tsp. fine sea salt
- ½ tsp. ground cinnamon
- ⅛ tsp. ground nutmeg
- 1 cup chopped green apple, skin removed
Ingredients for the Maple Glaze
- ¼ cup, plus 2 tablespoons, powdered sugar
- 1 tbsp. pure maple syrup
- ½ tsp. pure vanilla extract
- ½-1 tbsp. water or milk
Instructions
- Preheat oven to 350-degrees F.
- Line an 8x8 inch baking dish with parchment paper. Allow extra paper to hang over 2 of the sides (if needed, you can spray the bottom with a little non-stick spray so the paper sticks). This will allow for easy removal of the bars. Set aside.
- In a large microwave safe bowl, melt the butter in 30-second increments. Allow to cool to room temperature and then add the coconut sugar to the melted butter. Using a hand-held mixer, mix on medium-low speed until a thick caramel like texture has formed (this should take about 2 minutes).
- Add the egg, egg yolk, and vanilla. Mix until smooth.
- In a separate bowl, whisk together the gluten-free flour, baking powder, salt, cinnamon, and nutmeg. Add ½ of the flour mix at a time to the sugar/butter mix. Using your mixer, mix on low speed until just combined. Do not overmix.
- Fold in the green apple, reserving a few pieces to sprinkle over the top before baking.
- Spread blondie batter into prepared pan. Batter may be sticky, so wet your hands, or a back of a spoon, to easily spread the batter out. Sprinkle, and lightly push down, the batter with leftover apples.
- Bake for 25-28 minutes, or until a toothpick entered in the center comes out the clean the edges are just beginning to lightly brown.
- While blondies are cooling, make the glaze. In a small bowl, whisk together the powdered sugar, maple syrup, vanilla, and milk/water. If needed, you can add additional powdered sugar to thicken, or additional maple syrup to thin. You want the glaze to be thick, but pourable.
- Drizzle glaze over cooled blondies. Allow to set before removing from pan. Using the parchment paper, gently remove the bars from the pan. Cut into squares and transfer to a serving tray (alternatively, you can serve them directly from the pan).
- Enjoy!
Notes
- Mix until the flour has just been incorporated. This will help create a chewy, dense texture... just the way blondies and cookie bars should be. And don't let these bake beyond just done - this also ensures a chewy, gooey center!
- If you'd like a fully refined sugar-free dessert, you can use coconut powdered sugar to make the glaze.
- Make sure the glaze is thick. If the glaze is too thin, the bars will absorb it over time. The glaze should be thin enough to pour, but thick enough that it doesn't spread too much when poured.
- Is using a 9x9 pan, reduce baking time by a few minutes. Also, know bars will be thinner if using a 9x9 pan. You can also double the recipe and use a 9x13 pan.
pam says
can i use garbonzo GF flour/chickpea GF flour? and is there a way to incorporate apple sauce instead of fresh apples?
Sara says
Hi Pam - I am not sure that using garbanzo/chickpea flour will work the same as a gluten free 1:1 blend. I have never baked with chickpea flour so I can't say for sure, but in some quick research I did, I don't think it would turn out the same. As far as the apple sauce, you could try replacing the eggs with apple sauce, but the final texture may not turn out the same. If you do make any modifications, please let me know how they go.
Anne says
We made these over the weekend and they were a huge hit! I made them for some gluten free friends, and even the gluten eaters loved these. You would never know they are gluten free. Thanks for the great recipe!