
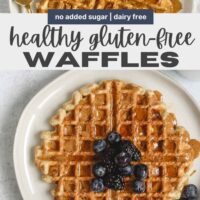

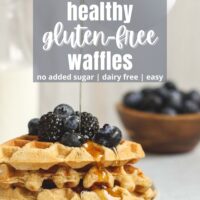
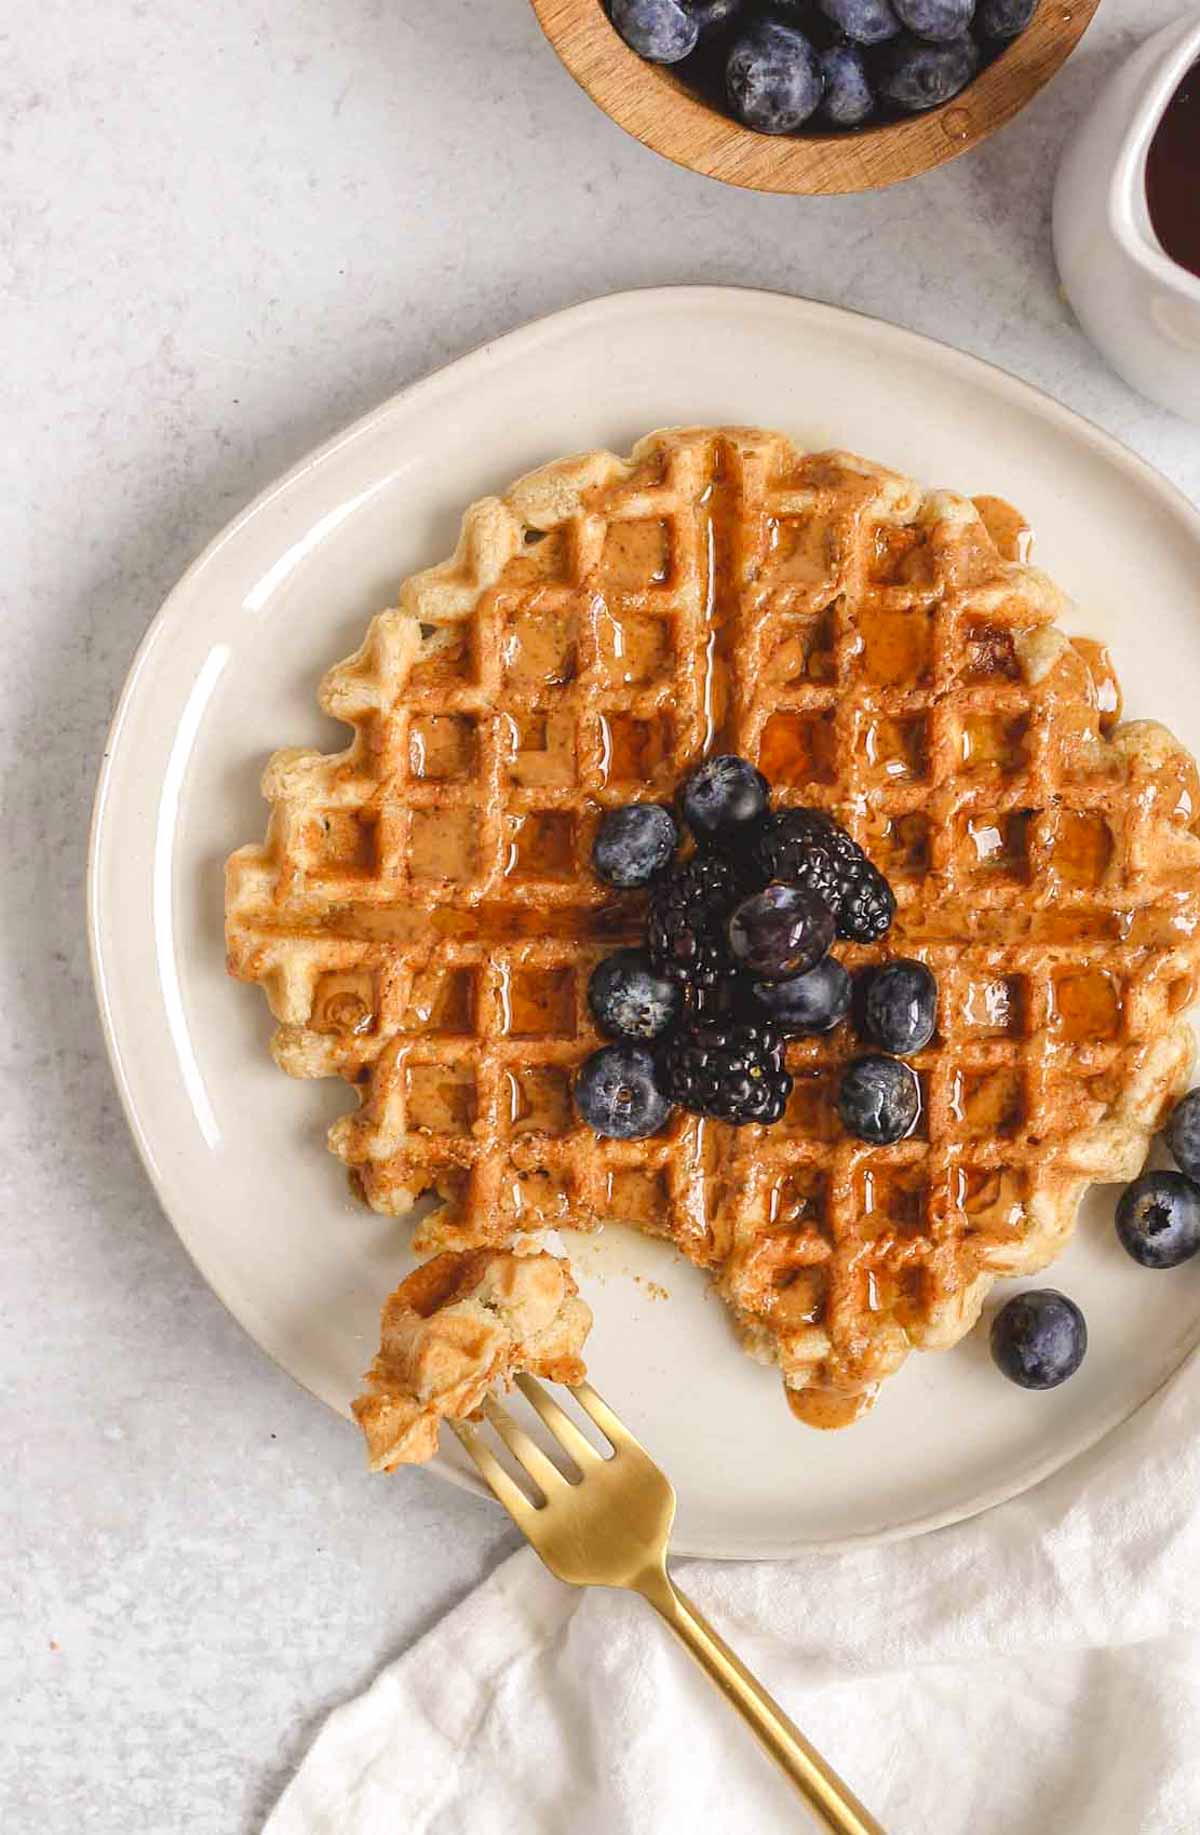
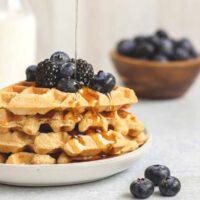
This gluten-free and dairy-free waffle recipe is made using simple, real food ingredients with no added sugar. Perfectly fluffy on the inside with a crisp outside - these waffles are ready in less than 30 minutes and require only one bowl.
Serve alongside a quiche with sweet potato crust, or dairy-free frittata, and some fruit for a well rounded breakfast.

⭐⭐⭐⭐⭐
One reader said: "The best gluten-free waffles I've ever had!!" - Ann
Why You'll Love This Recipe
- No refined flours - These waffles use only oat flour (I use homemade oat flour) and almond flour. If in need of a nut-free waffle, you can use my gluten-free oat flour pancake recipe for waffles, too.
- No added sugar - I use one banana to lightly sweeten these waffles; that's it!
- Good source of protein - Thanks to the combination of almond flour and oat flour, each waffle has a whopping 13 grams of protein (without needing protein powder)! My chocolate protein pancakes and banana protein muffins are also high in protein.
- Perfect for freezing - These are the ultimate waffles for food prepping. They freeze great and are just as good (maybe even better) after toasting them. My almond flour blackberry muffins are also perfect for freezing, so be sure to give those a try.
This is honesty the absolute best gluten-free & dairy-free waffle recipe (I may be biased, but I really do think so)! I've been playing around with different recipes for quite some time and I finally landed on one I wanted to share. These waffles are cakey and soft on the inside and crisp on the outside - everything a waffle should be.
Jump to:
Ingredient Notes
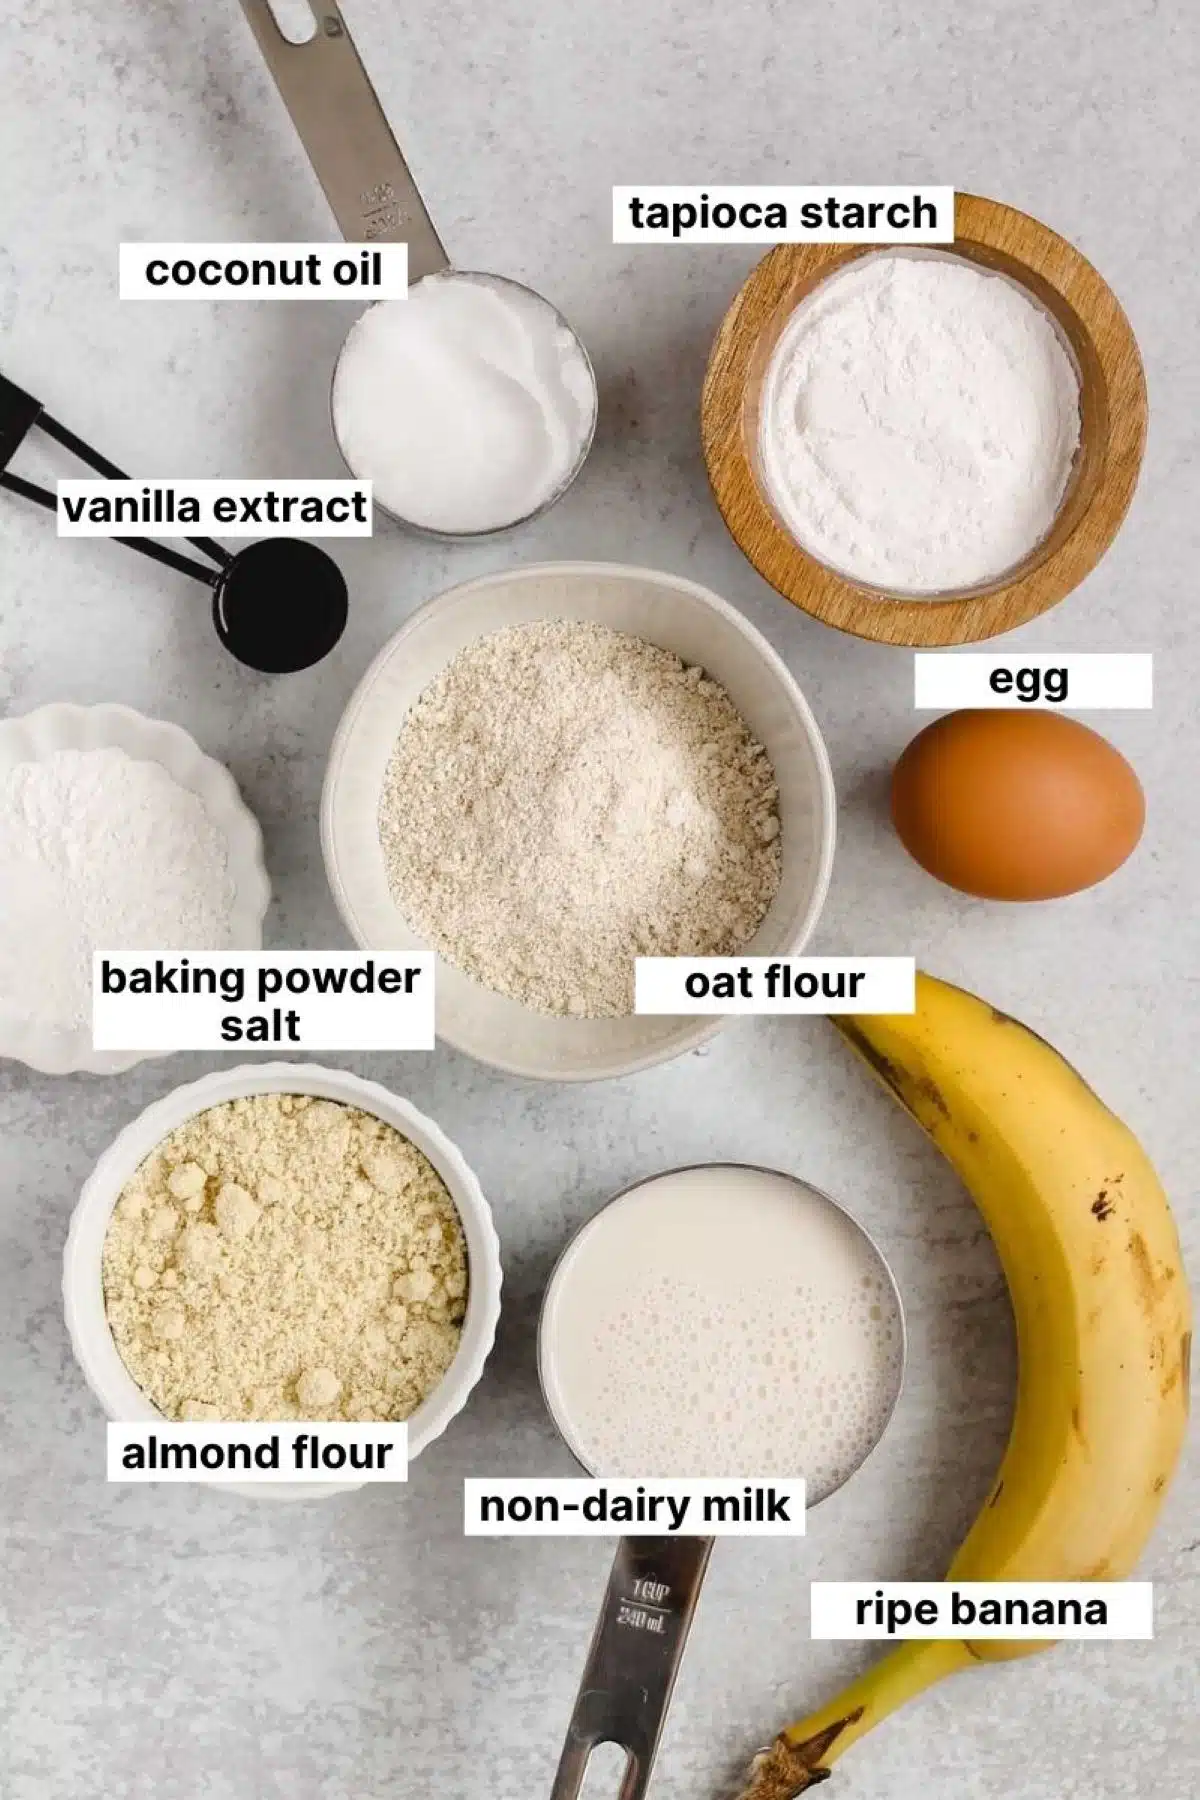
- Almond flour - Make sure to use almond flour and NOT almond meal (almond flour is more finely ground and is better for the overall texture).
- Non-dairy milk - I typically use almond milk, but any non-dairy milk will work in this recipe. Just make sure it's plain an unsweetened. And if you aren't dairy free, cow's milk works too.
- Oat flour - If making for someone with celiac's or a gluten sensitivity, be sure to use certified gluten-free oat flour (even though oats are technically gluten free, they can become contaminated during processing). Also, I prefer to make my own oat flour - it's easier and cheaper!
- Banana - The more ripe the banana the better - the more brown your banana is, the more natural sweetness you'll get. I like to use a frozen banana - they provide more sweetness.
- Coconut oil - You'll notice when shopping for coconut oil you can buy refined or unrefined. I opt for unrefined because it's less processed/cleaner. I typically buy Nutiva Virgin Coconut Oil, but either refined or unrefined can be used.
A complete list of ingredients can be found in the recipe card below. The above are some specific notes to help with selecting ingredients.
Substitutions
- Tapioca starch/flour can be substituted with arrowroot starch.
- To make vegan, you can sub a flax-egg, or egg replacement, for the egg.
- The coconut oil can be replaced with vegan butter, avocado oil, or extra-virgin olive oil.
How to Make Gluten-free & Dairy Free Waffles
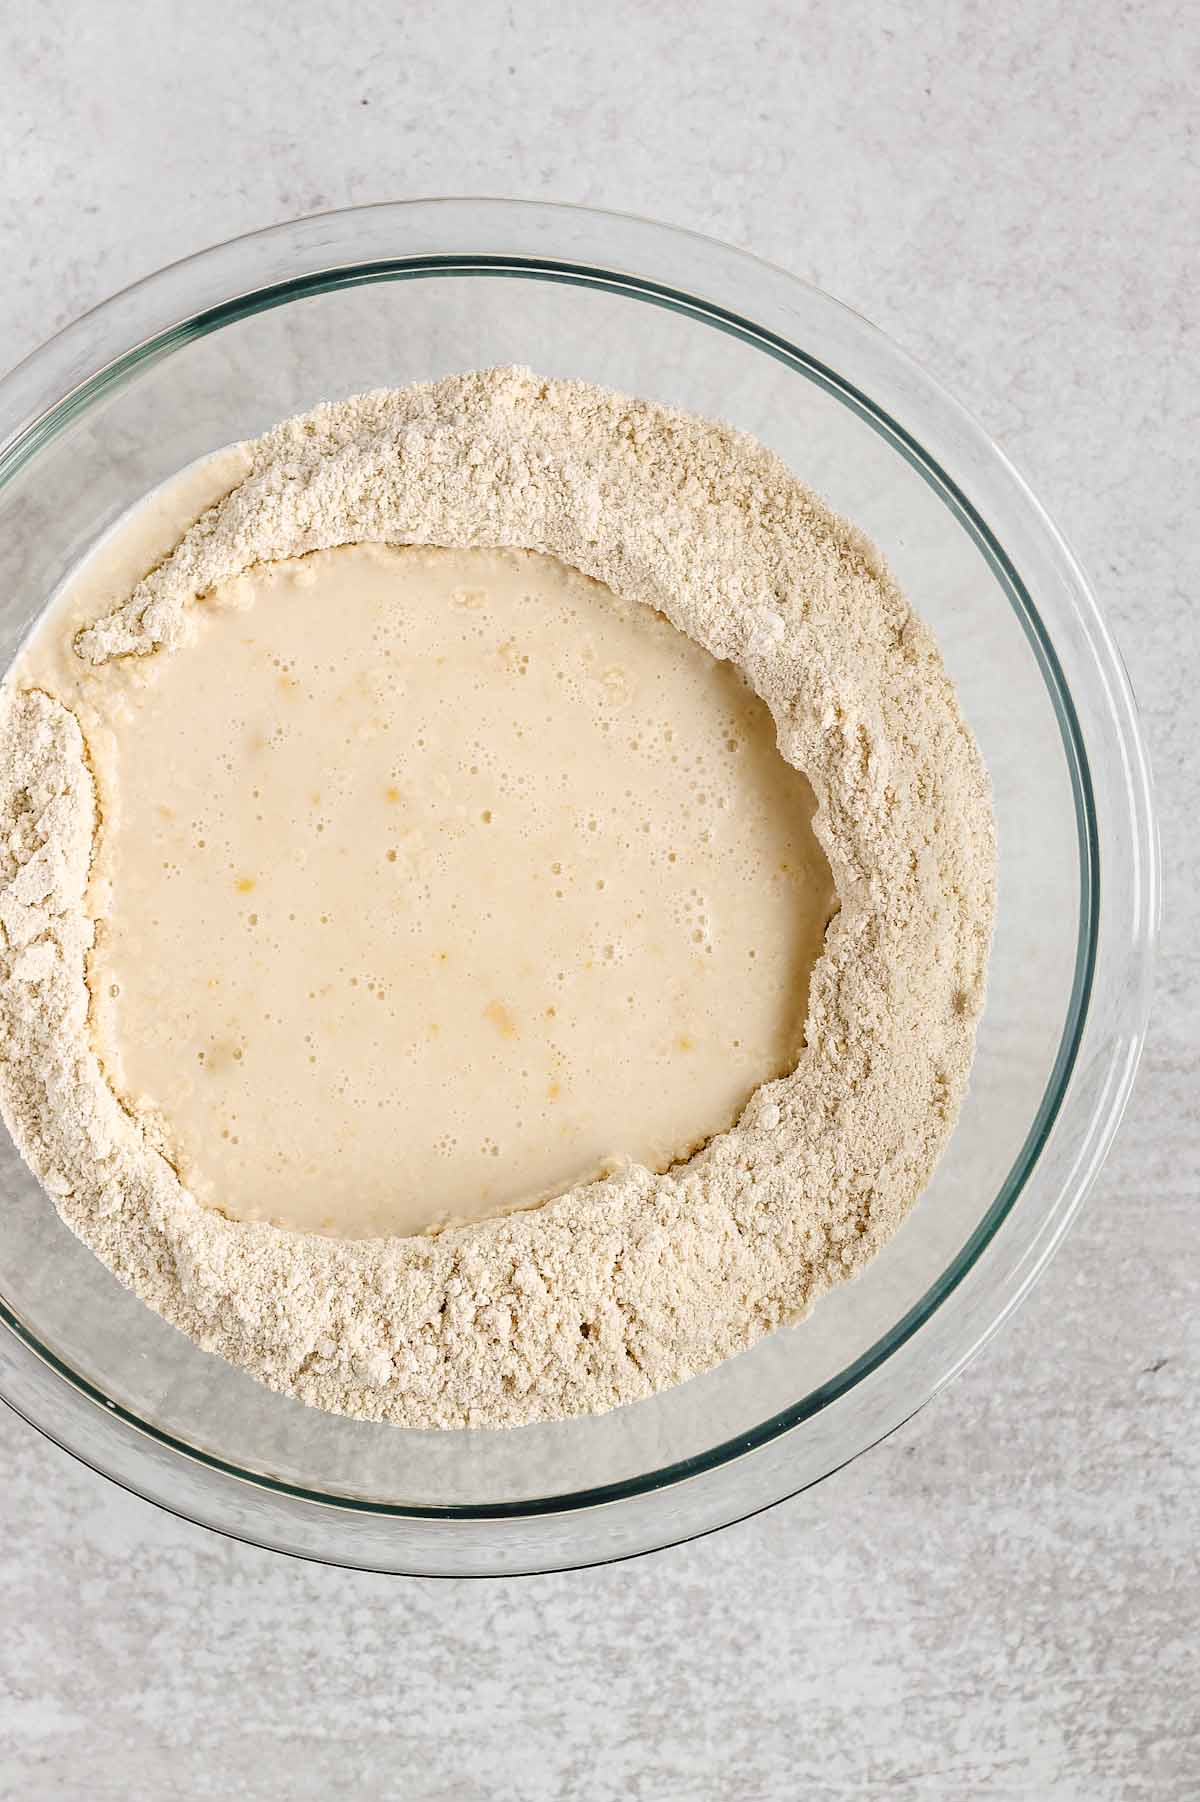
Step 1: Mix all dry ingredients together in a large mixing bowl. Make a well in the center of the dry ingredients and add in remaining wet ingredients.
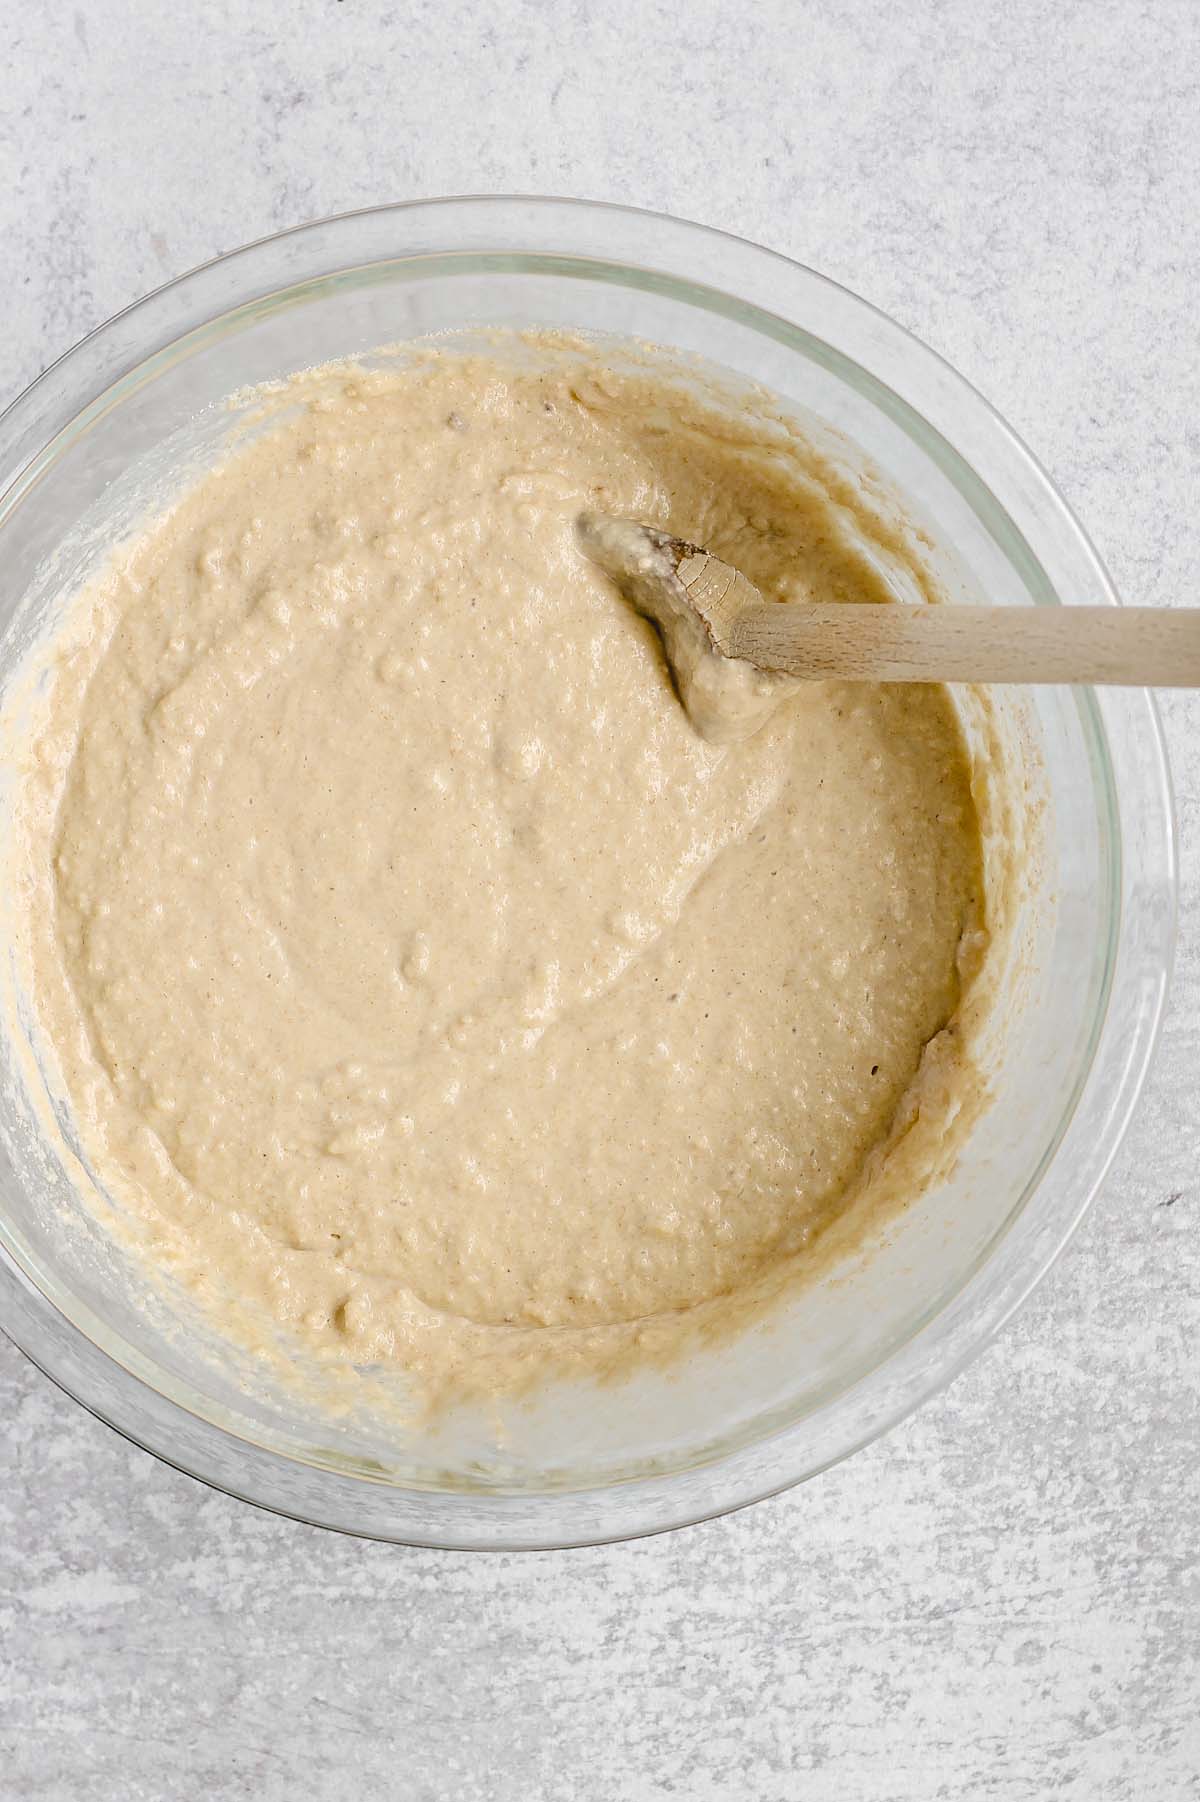
Step 2: Whisk egg with the wet ingredients first, then fully mix all ingredients together to make your waffle batter.
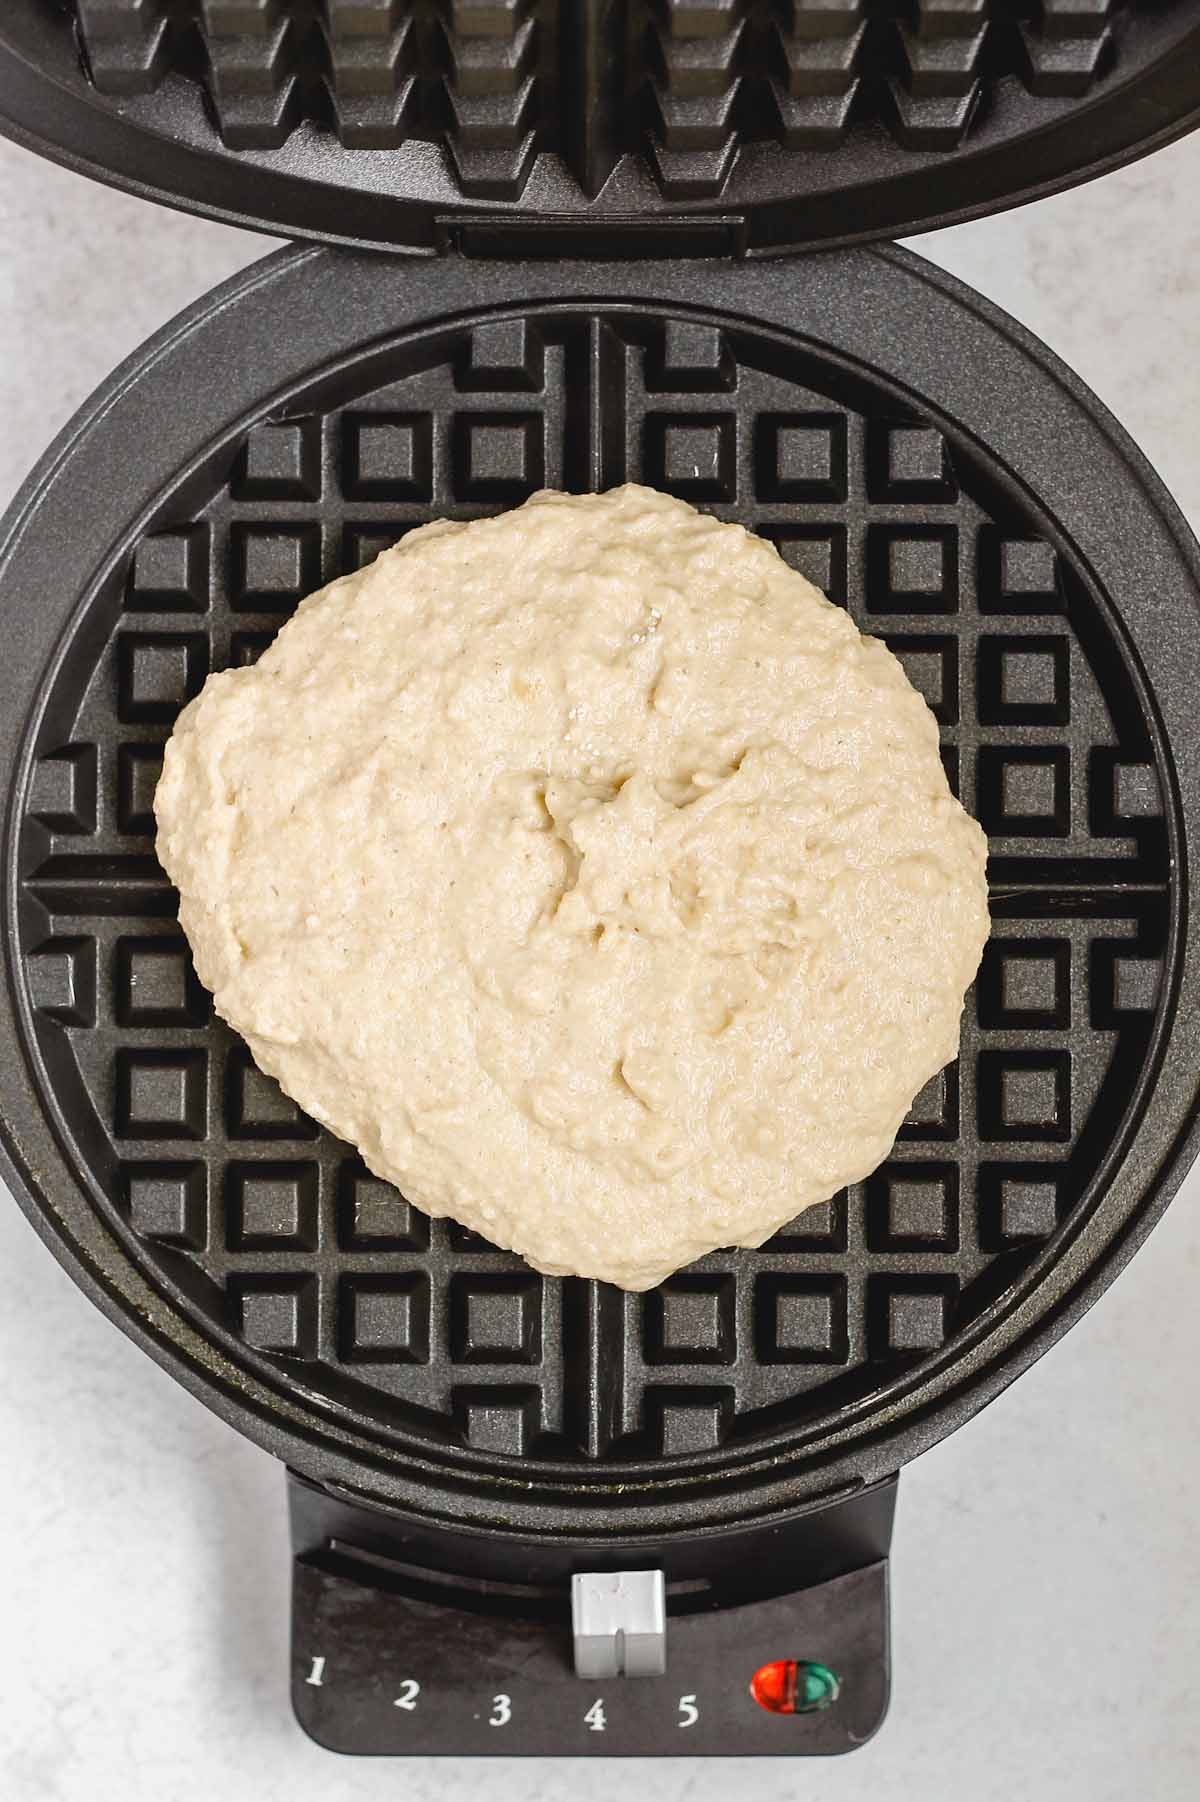
Step 3: Using a ½ cup measuring cup (how much batter you need will depend on your waffle iron), scoop and pour batter into the center of your pre-heated waffle iron.
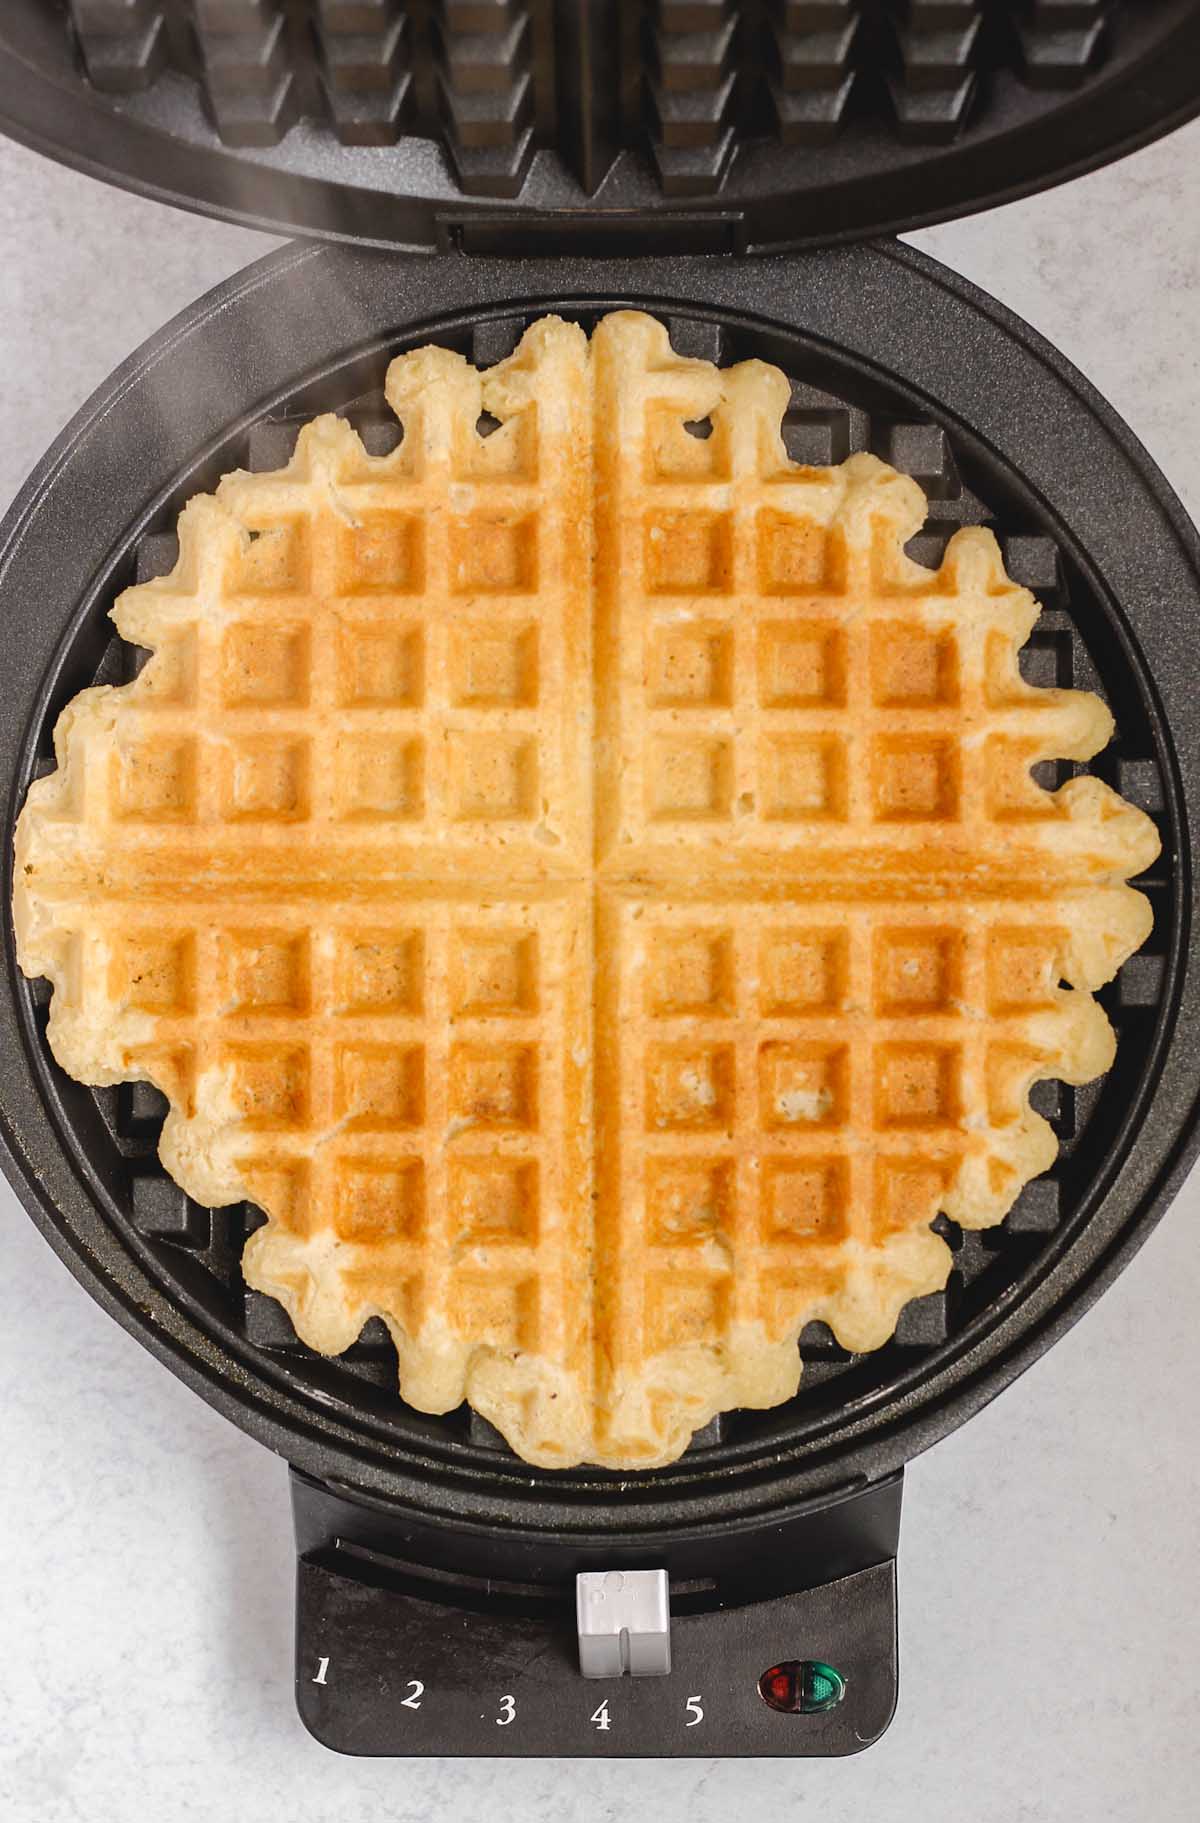
Step 4: Close and cook until light brown and crispy. Using a fork, carefully remove waffle. Repeat until all batter has been used.
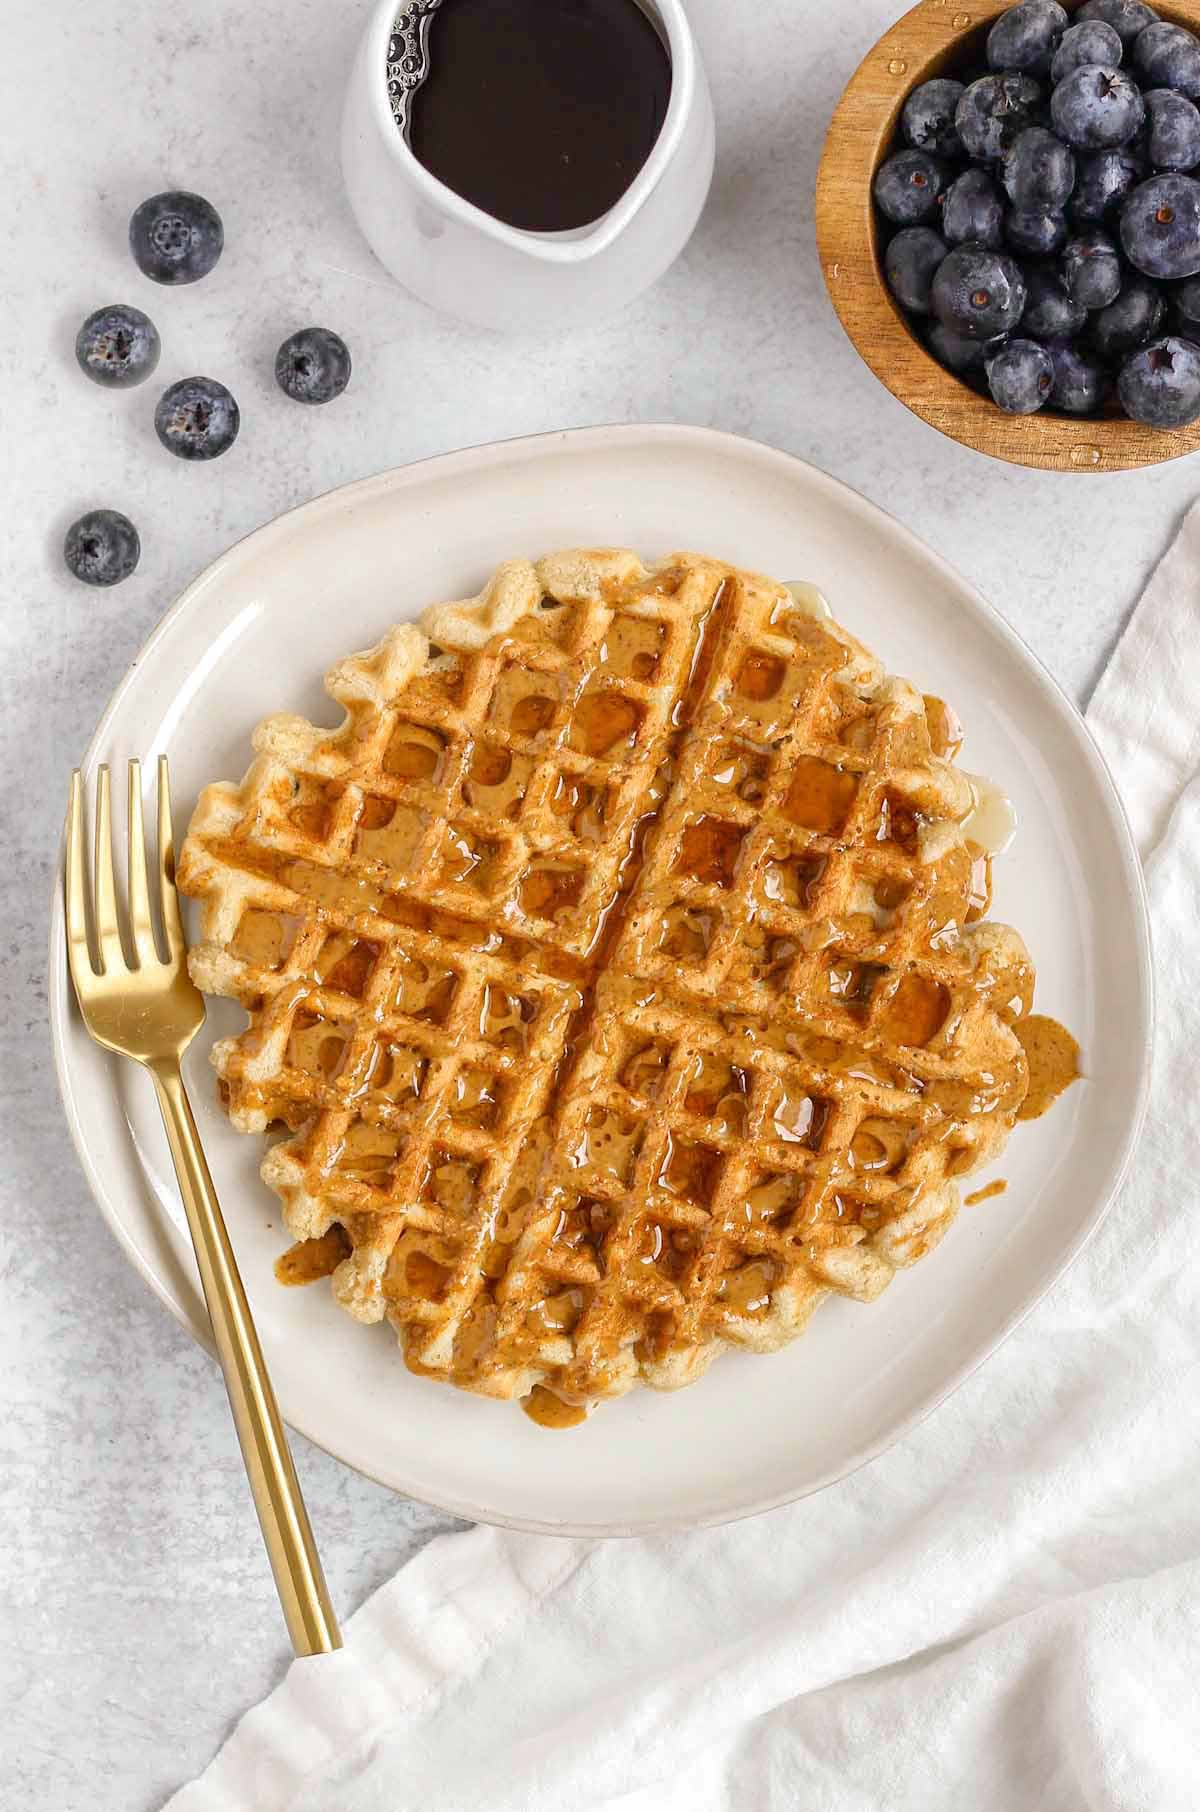
Finally, enjoy with your favorite toppings! I love spreading with nut butter and fresh fruit. And if I'm feeling extra sassy, I'll drizzle on some pure maple syrup or top with coconut whipped cream.
Tips for Crispy Waffles
- Preheat your waffle maker: Make sure it's hot (medium-high to high heat) before adding batter. You should hear a sizzle when the batter hits the waffle maker.
- Cool on a wire rack: After cooking, place waffles on a wire rack so the steam can escape. This keeps them from getting soggy.
- Let the waffle maker reheat: Before making the next waffle, give your iron time to heat back up so each waffle cooks evenly and crisps up nicely.
- Crisp in the oven: Preheat your oven to 225°F. Place a wire rack on a baking sheet, add the cooked waffles, and bake for 5-7 minutes. The rack helps keep them crisp as the steam escapes.
How to Reheat and Freeze
Freeze: Allow waffles to fully cool before freezing. Place parchment paper between each waffle and freeze in a freezer safe bag or airtight container. Freeze for up to 3 months.
Reheat: Pop frozen waffles straight into the toaster until heated through and crispy. Alternatively, you can reheat frozen waffles in the oven by preheating to 350°F and baking on a baking sheet for 8-10 minutes.
⭐TIP: Be sure to double, or even triple, the batch so you have a lot leftover for freezing! My chocolate protein bread is also great for freezing!
Recipe FAQs
Any waffle iron will work, you will just need to adjust the amount of batter per waffle based on the iron you use. Cuisinart has a great one that is inexpensive and works great. I've had it for years with no issues. You can also us a Belgian waffle iron.
Yes, you can replace the egg with a flax egg or other egg substitute/egg replacer.
Almond milk is a great choice, but any non-dairy milk that is plain and unsweetened can be used.
More Breakfast Options to Try!
If you make this recipe, please let me know what you think! I would so appreciate you leaving a star rating and/or comment below. And don't forget to share a photo on Instagram or Facebook and mention @CleanPlateMama!
Eat Clean.Be Well!
-Sara
Gluten-free + Dairy-free Waffles
Save This Recipe For Later!
Equipment
- 1 waffle iron
- 1 Mixing bowl
Ingredients
- 1 ½ cups almond flour
- 1 ½ cups gluten-free oat flour
- ¼ cup tapioca starch (also called tapioca flour)
- 2 tsp. baking powder
- ¼ tsp. salt
- 1 ripe, mashed banana
- ¼ cup coconut oil, melted (avocado or EVOO also work)
- 1 egg
- 1 ¼ cups dairy-free milk (plain and unsweetened)
- 1 tsp. pure vanilla extract
Instructions
- In a large bowl add the almond flour, oat flour, tapioca starch, baking powder, and salt. Mix to combine.
- Create a well in center of the dry ingredients and add in mashed banana, melted coconut oil, egg, milk, and vanilla. Whisk the wet ingredients together first and then mix all ingredients together. Do not overmix the batter (if a few clumps remain, that is okay).
- Preheat your waffle iron to medium-high heat. Scoop ½ cup of batter onto pre-heated waffle iron and cook according to the directions of your waffle maker.
- Use a fork to carefully remove the cooked waffles from waffle iron and place them on a wire cooling rack (this helps maintain their crispiness). Repeat step 3 until all batter has been used.
- Top with syrup, fresh fruit, or your favorite toppings. Enjoy!
Notes
- I typically use almond milk, but any non-dairy milk will work. Cow's milk will work too if you aren't dairy free.
- If you're waffle iron is non-stick, do not spray with cooking spray (this could actually make the waffles stick). But, if you're waffle iron is NOT non-stick, you'll want to spray your waffle iron before adding the batter.
- As this batter sits, it will begin to thicken. You can thin out by adding 1-2 additional tablespoons of dairy-free milk.
- Waffles are best right out of the waffle iron, as they will lose their crispiness as they sit. If not eating them right away, you can throw them in the oven at about 225-F to keep them crispy and warm, or throw them in the toaster quick right before you eat them.
- This recipe makes 6 waffles using ½ cup batter per waffle. You may get more/less pending which waffle iron you use.

Ann Newlander says
the best gluten free waffles I've ever had!!!
Sara says
So glad to hear. Thanks for letting me know!
Sarah says
Thanks for the great recipe! So simple and so good!